
☁️ Introduction
Before Terraform can create resources in Azure, it needs to authenticate — to prove who you are.
Once authenticated, Azure checks your permissions (authorization) to determine what you’re allowed to do.
The easiest way to authenticate Terraform is through the Azure Command-Line Interface (CLI).
In this post, we’ll:
✅ Authenticate Terraform using Azure CLI
✅ Deploy your first Virtual Machine (VM) with Terraform
⚙️ Prerequisites
Before you begin, make sure you have the following ready:
- An Azure subscription
- A Linux terminal — either on Ubuntu or WSL2 with Ubuntu on Windows following the post Getting Started with WSL2: Run Linux Inside Windows.
- Azure CLI installed and logged in. You can follow the blog post Getting Started with Azure CLI on Linux (Ubuntu) and Windows (WSL2 with Ubuntu) or Getting Started with Azure CLI on Your Local Machine.
- Terraform installed. You can follow the blog post Installing Terraform on Linux (Ubuntu) and Windows (WSL2 with Ubuntu) or Installing Terraform on MacOS.
🧩 Step 1: Create Terraform Files
Create a new folder (e.g., terraform-azure-vm) and inside it, create a file named main.tf.
mkdir terraform-azure-vm
cd terraform-azure-vm
nano main.tf
Create a file named main.tf.
nano main.tf Alternatively if you are familiar with the vi editor, you may create file as vi main.tf. Personally I use vi.
Paste the right version of Terraform configuration code based on whether you want to create a new resource group or use an existing one and and save file.
💡Note: If your Resource Group was provided to you (for example, “rg-student-john”), use code option 2.Also make sure the address_space and address_prefixes are not in use already.
Code Option 1 (Create a new Resource group):
terraform {
  required_providers {
    azurerm = {
      source  = "hashicorp/azurerm"
      version = "~> 4.0"
    }
  }
}

provider "azurerm" {
 resource_provider_registrations = "none" # This is only required when the User, Service Principal, or Identity running Terraform lacks the permissions to register Azure Resource Providers.
  features {}
#Uncomment the line and hardcode subscription id if you are not using ARM_SUBSCRIPTION_ID environment variable in next step
#subscription_id = "your-subscription-id"
}

# Option 1: Create a new Resource Group
resource "azurerm_resource_group" "rg" {
  name     = "tfcli-rg"
  location = "eastus"
}

# Create a Virtual Network
resource "azurerm_virtual_network" "vnet" {
  name                = "tfcli-vnet"
  address_space       = ["10.0.0.0/16"]
  location            = azurerm_resource_group.rg.location
  resource_group_name = azurerm_resource_group.rg.name
}

# Create a Subnet inside the Virtual Network
resource "azurerm_subnet" "subnet" {
  name                 = "tfcli-subnet"
  resource_group_name  = azurerm_resource_group.rg.name
  virtual_network_name = azurerm_virtual_network.vnet.name
  address_prefixes     = ["10.0.1.0/24"]
}
Code Option 2 (Using an existing Resource group):
terraform {
  required_providers {
    azurerm = {
      source  = "hashicorp/azurerm"
      version = "~> 4.0"
    }
  }
}

provider "azurerm" {
 resource_provider_registrations = "none" # This is only required when the User, Service Principal, or Identity running Terraform lacks the permissions to register Azure Resource Providers.
  features {}
#Uncomment the line and hardcode subscription id if you are not using ARM_SUBSCRIPTION_ID environment variable in next step
#subscription_id = "your-subscription-id"
}

# Option 2: Use an existing Resource Group (if provided)
data "azurerm_resource_group" "rg" {
  name = "student-assigned-rg-name"
}

# Create a Virtual Network
resource "azurerm_virtual_network" "vnet" {
  name                = "tfcli-vnet"
  address_space       = ["10.0.0.0/16"]
  location            = data.azurerm_resource_group.rg.location
  resource_group_name = data.azurerm_resource_group.rg.name
}

# Create a Subnet inside the Virtual Network
resource "azurerm_subnet" "subnet" {
  name                 = "tfcli-subnet"
  resource_group_name  = data.azurerm_resource_group.rg.name
  virtual_network_name = azurerm_virtual_network.vnet.name
  address_prefixes     = ["10.0.1.0/24"]
}
💡Note: In Terraform, we use a data block to read information about an existing resource in Azure, while a resource block is used to create a new one. When using a data block, we must reference it with the data prefix (for example, data.azurerm_resource_group.rg) to access attributes like the Resource Group’s name or location.
⚡ Step 2: Initialize and Deploy with Terraform
Before running Terraform, set your Azure subscription ID environment variable so Terraform always uses the correct one:
export ARM_SUBSCRIPTION_ID="your-subscription-id"
💡 Setting this environment variable ensures Terraform uses the right subscription every time — no surprises even if you log in again or switch tenants.
Now run the following commands one at a time from the same directory as your main.tf file.
1️⃣ Initialize Terraform
terraform init
Downloads the Azure provider plugin and prepares Terraform for this project.
💡 You’ll see “Terraform has been successfully initialized.” when ready.
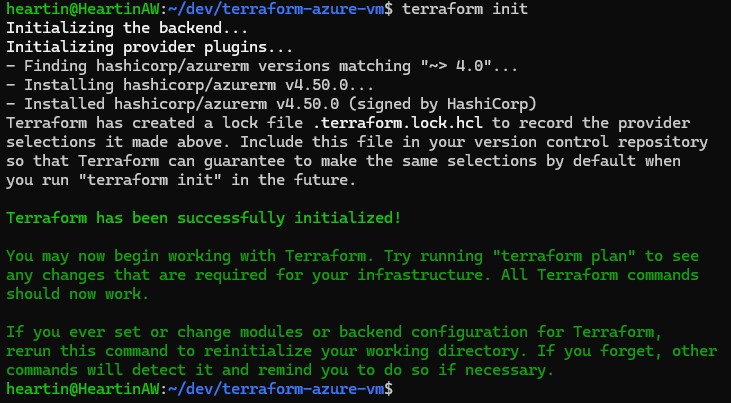
2️⃣ Review the Plan
terraform plan
Previews what Terraform will create — nothing is applied yet.
💡 Look for “Plan: 3 to add, 0 to change, 0 to destroy.”
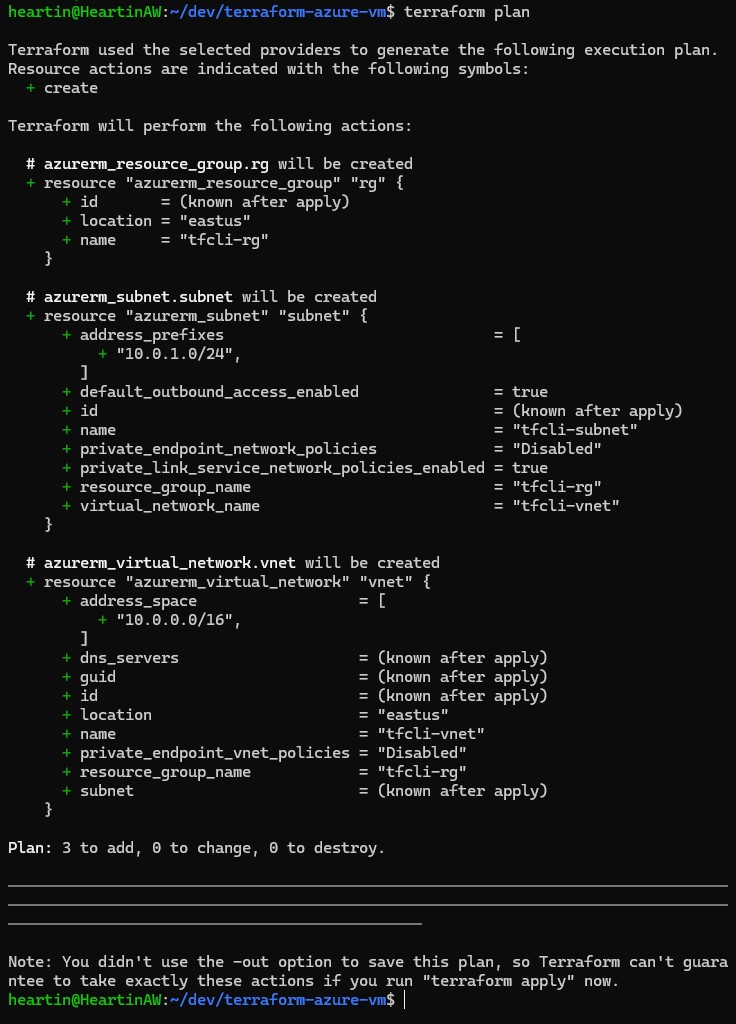
💡 Terraform may show a note suggesting the -out option (e.g., “You didn’t use the -out option…”). You can safely ignore it for this lab, but in production environments, use terraform plan -out=tfplan and then terraform apply tfplan for consistency.
3️⃣ Apply the Configuration
terraform apply
Terraform connects to Azure using your Azure CLI login and starts creating the resources. It will show us the plan again and a prompt to confirm change.
When prompted, type yes and press Enter.
💡 After a short while, you should see:
Apply complete! Resources: 3 added, 0 changed, 0 destroyed.
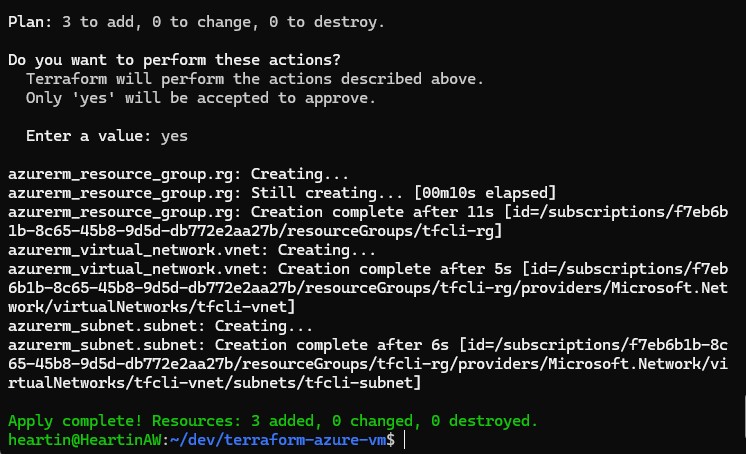
4️⃣ Verify in Azure Portal
Go to the Azure Portal → Resource Groups → tfcli-rg,
and confirm that the Virtual Network (tfcli-vnet) was created successfully.
Then, open the Virtual Network and check inside it to confirm that the Subnet (tfcli-subnet) was also created successfully.
💡 If your Resource Group name differs, open the one assigned to you instead.
5️⃣ (Optional) Clean Up
terraform destroy
Removes all resources you just created.
When prompted, type yes to confirm.
💡 You’ll see “Destroy complete! Resources: 2 destroyed.” — keeping your Azure environment clean.
🔍 Step 5: Verify in Azure
Go to the Azure Portal → Resource Groups → tfcli-rg,
and confirm that the Virtual Network (tfcli-vnet) was created successfully.
Then, open the Virtual Network and check inside it to confirm that the Subnet (tfcli-subnet) was also created successfully.
💡 If your Resource Group name differs, open the one assigned to you instead.
🧹 Step 6: Clean Up Resources
When done, destroy all created resources to avoid charges:
terraform destroy
Type yes when prompted. Removes all resources you just created.
💡 You’ll see “Destroy complete! Resources: 3 destroyed.” — keeping your Azure environment clean.
💡 You can also verify that the new resources were deleted from the Azur portal.
🧠 Summary
In this post, you:
✅ Logged in to Azure using az login
✅ Verified your authentication
✅ Used Terraform to create a VM in Azure
Azure CLI authentication is the simplest way to get started with Terraform on your local machine — perfect for testing, learning, and small projects.